Brandy redux
Posts: 2376
Joined: 2/7/2007
Status: offline

|
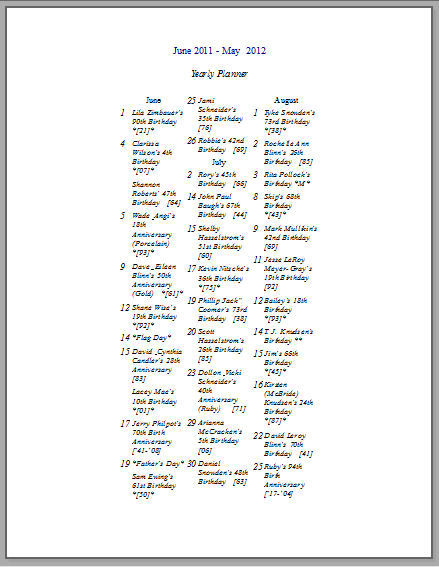
As can be seen in the image above, when Small Calendars are removed from a Year view, the space which was previously occupied by the Small Calendars is empty. That is caused by the fact that the Grid in the center of the page - which is used to display the Events - does not automatically expand to fill the empty space. The end result gives the impression of very large Left & Right margins.
To increase the Width of the Events Grid and set the desired size of the Left and Right Margins, the following steps should be performed BEFORE the Small Calendars are removed from the Year view.
NOTE #1: If the following steps are performed AFTER the Small Calendars are removed from the Year view, the size of the Events Grid will not change. In order for the size of the Events Grid to change, 1) the Small Calendars must be added to the Year view, 2) the Year view must be viewed with the Small Calendars in place, 3) the Small Calendars must be removed from the Year view. OR, you could just switch to another view, then switch back to the Year view.
NOTE: #2 If you wish to make additional adjustments after the Small Calendars have been removed, those settings will not be reflected on the Year view until after 1) the Small Calendars are added to the Year view, 2) the Year view is viewed with the Small Calendars in place, 3) the Small Calendars are removed from the Year view. OR, you could just switch to another view, then switch back to the Year view. 1. Open the Calendar Creator project, then switch to Year view
2. Select 'Layout' in the menubar, then select 'View Properties' in the menu that drops down
3. When the 'View Properties' window opens, click on the 'Objects' tab
4. On the Objects tab, click on 'Grid' in the 'Object list:' box
********************
The size and placement of the Events Grid is determined by entering the desired settings in the 'Placement' section of the Options tab for:
X - the distance from the left edge of the paper to the left edge of the Events Grid
Y - the distance from the top edge of the paper to the top edge of the Events Grid
Width - the actual Width of the Events Grid
Height - the actual Height of the Events Grid
NOTE #1: The desired settings must be entered in decimal format - but without the decimal:
For example: 25 = .25 or 1/4" - - 50 = .50 or 1/2" - - 100 = 1.00 or 1" - - 850 = 8.5 or 8 1/2" - - 1100 = 11.00 or 11" NOTE #2: If the desired margin is set to a size that is smaller than the unprintable margin area for the selected printer, a portion of the calendar will be cut off when it is printed. And, since the desired margin should be AT LEAST the same size as the unprintable margin area for the selected printer, it is always a good idea to check your printer manual to determine the unprintable margin area for all 4 edges of the paper.
NOTE #3: The default Page Margins for all Calendar Creator projects are 1/2" on all 4 sides of the paper. So, if you want to set the Year view margins smaller than 1/2", you will need to reduce the Page Margins before either viewing a Print Preview or printing the project:
1. Open the Calendar Creator project, then switch to Year view
2. Click on 'File' in the menubar
3. Select 'Page Setup' from the menu that drops down
4. Click on the 'Margins' tab
5. Set all 4 Page Margins to 0.00
6. Click 'OK' to return to the calendar project
********************
* To set Left and Right margins which are exactly the same size *
1. In the box next to 'X', enter the desired margin
2. Multiply the desired margin times 2 (for 2 equal margins)
3. Subtract the result of Step 2 from the Width of the paper for the selected project (i.e. 850 for an 8.5" x 11" Portrait project or 1100 for an 8.5" x 11" Landscape project)
4. Enter the result of Step 3 in the box next to 'Width'
For example: For 1/4" Left & Right margins on an 8.5" x 11" Portrait project:
1. X = 25
2. 25 x 2 = 50
3. 850 - 50 = 800
4. Width = 800 5. Click 'OK' to return to the calendar project
* To set Left and Right margins which are not exactly the same size *
1. In the box next to 'X', enter the desired Left margin
2. Add the desired Right margin to the figure entered in the box next to 'X'
3. Subtract the result of Step 2 from the Width of the paper for the selected project
4. Enter the result of Step 3 in the box next to 'Width'
For example: For a 1/2" Left margin and a 1/4" Right margin on an 8.5" x 11" Landscape project:
1. X = 50
2. 50 + 25 = 75
3. 1100 - 75 = 1025
4. Width = 1025 5. Click 'OK' to return to the calendar project
* To set Top and Bottom margins and Height of the Events Grid *
1. In the box next to 'Y', enter the desired distance from the top edge of the paper to the top edge of the Events Grid - keeping in mind that the top edge of the Events Grid must be positioned below the Title, Subtitle and any desired images.
2. Add the desired Bottom margin to the figure which was entered in the box next to 'Y'
3. Subtract the result of Step 2 from the Height of the paper for the selected project (i.e. 1100 for an 8.5" x 11" Portrait project or 850 for an 8.5" x 11" Landscape project)
4. Enter the result of Step 3 in the box next to 'Height'
For example: To place the top edge of the Events Grid 3/4" from the top edge of the paper, with a 1/4" Bottom margin on an 8.5" x 11" Landscape project:
1. Y = 75
2. 75 + 25 = 100
3. 850 - 100 = 750
4. Height = 750 * To remove the Small Calendars and change the Number Of Event Columns *
1. If your Year view is more than one page, scroll to the left to the first page of the Year view
2. Right click on the Events list, then select 'Properties' from the menu that drops down
3. When the 'Layout Object Properties' window opens, click on the 'Miscellaneous' tab
4. On the 'Miscellaneous' tab, click in the box next to 'Show Small Calendars' - to remove the check mark
5. Click on the down arrow next to the 'Number of Event Columns' box, then select the desired number of columns
6. Click 'OK' to return to the calendar project
 Attachment (1) Attachment (1)
< Message edited by Brandy redux -- 6/18/2012 12:02:19 PM >
_____________________________
For More Help: Click on the FAQ link at the top of this page Then, click on the All FAQ's button on the next page To contact me by email, please send your message to pine_97@yahoo.com
|

 Printable Version
 Reduce margins on Year view without Small Calendars -


 New Messages
 No New Messages
 Hot Topic w/ New Messages
 Hot Topic w/o New Messages
 Locked w/ New Messages
 Locked w/o New Messages
 Post New Thread