Brandy redux
Posts: 2376
Joined: 2/7/2007
Status: offline

|
Hi lesliedfrench,
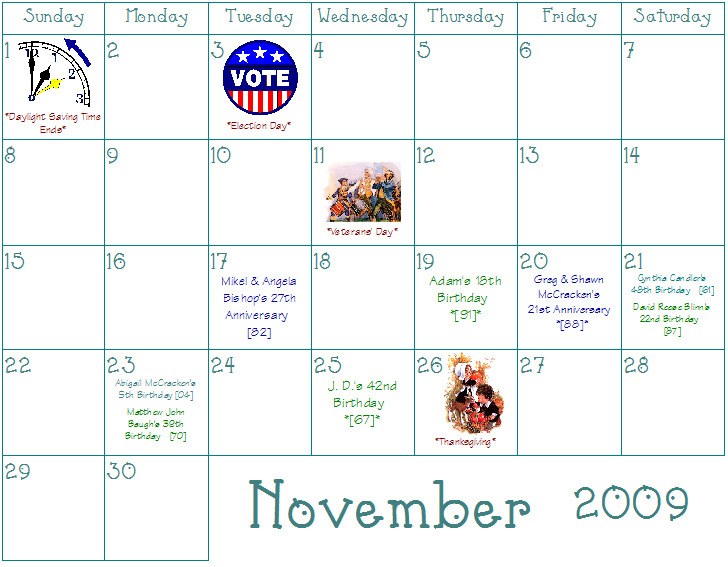
As can be seen in the image at the bottom of this message, it is possible to make the actual calendar space nearly the full 8 1/2 x 11. However, it is very important to keep in mind that all printers (even borderless printers) have unprintable margin areas. And, any text or graphics that is placed in that unprintable margin area will not print. So, if you are not planning to use a borderless printer, you might want to check your printer documentation to determine the size of the unprintable margin areas on all four sides of the paper. With some printers, the unprintable margin area is the same for all 4 sides. But, with some printers, each of the 4 margin areas can be a different size.
To enlarge the calendar space, you would do this:
1. Click on 'Select 'Start with a Basic Calendar', then click on the 'Finish' button.
2. When the calendar opens, click on the down arrow next to the 'Month with Tasks' box, then select 'Month' in the menu that drops down.
3. If you want the margins around the edge of the calendar to be smaller than 1/2 inch AND if you know the unprintable margin area for your printer is less than 1/2 inch, click on 'File' in the menu bar, then select 'Page Setup' in the menu that drops down.
4. When the 'Page Setup' window opens, click on the 'Margins' tab. Set each of the margins to match the unprintable margin area for the printer, then click on 'OK' to return to the calendar workspace.
NOTE: If you want to print your calendar project without margins, you must use a BORDERLESS printer, with the Borderless printer option activated and one of the glossy paper settings selected - because, even though you don't have to print on glossy paper, most borderless printers will not permit you to activate the borderless option unless one of the glossy paper options is selected.
5. If you don't want to keep the 'Monthly Planner' text, right click on that text, then select 'Delete' from the menu that drops down.
6. Right click on the Month and Year, then select 'Set Moveable' in the menu that drops down. Then, move the Month and Year text to the desired location.
7. Click anywhere in the calendar grid.
8. Hover your mouse cursor over the yellow box that appears just above the word 'Wednesday'. When the mouse cursor changes to a double-headed arrow, click and drag upward - to fill the empty space below the Month and Year.
And, that's pretty much all there is to it.
If you would like to create a calendar in Landscape format, you will need to create a Custom Landscape View. Please click on the link below
http://forums.encoreusa.com/tm.asp?m=44374
to view the directions for creating a Custom Landscape View.

 Attachment (1) Attachment (1)
< Message edited by Brandy redux -- 5/4/2012 1:28:19 AM >
_____________________________
For More Help: Click on the FAQ link at the top of this page Then, click on the All FAQ's button on the next page To contact me by email, please send your message to pine_97@yahoo.com |

 Printable Version


 New Messages
 No New Messages
 Hot Topic w/ New Messages
 Hot Topic w/o New Messages
 Locked w/ New Messages
 Locked w/o New Messages
 Post New Thread