Brandy redux
Posts: 2376
Joined: 2/7/2007
Status: offline

|
Using Address Merge
Whether you're creating a form letter, mailing labels, envelopes, or greeting cards, The Print Shop's Address Merge feature (also called Mail Merge) makes it easy to personalize your project for every person you plan to send it to.
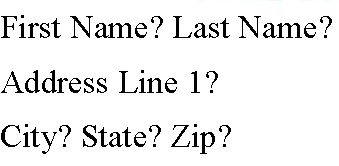
Address Merge fields are placeholders in text boxes. When you print your project, The Print Shop replaces the placeholders with information from your Address Book. The information can be a first name or a complete address. Address Merge fields allow you to address your card, envelope, or other project to more than one person without having to retype their names and reprint your project over and over again.
When you print a project that contains Address Merge fields, multiple versions of the project will print, each one with different contact information for each name you selected from the Address Book.
Adding Address Merge Fields
You can add Address Merge fields to text, which inserts placeholders for information contained in your Address Book.
1. On the Design Desk, double-click the text box into which you want to add an Address Merge field.
2. Click inside the text box at the location where you want to place the Address Merge field.
The I-beam moves to that location.
3. Choose 'Insert Address Merge Field' from the 'Text' menu.
4. In the Mail Merge Fields dialog box, select fields from the Address Book Fields list box, then click 'Add'.
Fields are moved to the Selected Fields list box. These are the fields that will be placed into the text box, and then replaced with values from the Address Book when you print.
5. To remove a field, select it from the Selected Fields list box, and then click 'Remove'.
6. When you have finished selecting all of the Address Merge Fields that you would like to place in the text box, click 'Insert'.
The Address Merge fields are inserted into the text.
You can format this text like any other text.
Tip: In the Mail Merge Fields dialog box, you can also click Receiver Address to automatically insert that group of standard information into the text box.
Note: If you inserted more than one field, you will need to add spaces or punctuation between them.
You can remove an Address Merge field by selecting it in the text box, and then clicking Delete.
Printing your project
Before you can print this project with the appropriate information automatically filled-in, you must select the specific people in your Address Book from which you want The Print Shop to draw the information.
1. Click 'File' in the menubar, then select 'Print' in the menu that drops down.
2. When the Print window opens, click on the 'Merge Names' button.
3. In the Merge Names dialog box, click 'Select List'.
4. In the Open dialog box, select the appropriate address book, and then click 'Open'.
5. In the Merge Names dialog box, select the names from the list box whose contact information you want to include in the current project by clicking each name.
You can also click Select All to include all the contacts in the list.
6. Click 'OK' to return to the Print dialog box.
NOTE: For mail merge projects, the Print Shop Print Preview will display the same name on all items on the page.
If you want to see a preview of the project before it is printed, the quickest solution would be to set your printer to display a Print Preview before you print the project. Your printer's Print Preview should display the project exactly as it will be printed.
 Attachment (1) Attachment (1)
< Message edited by Brandy redux -- 6/27/2012 11:52:22 AM >
_____________________________
For More Help: Click on the FAQ link at the top of this page Then, click on the All FAQ's button on the next page To contact me by email, please send your message to pine_97@yahoo.com
|

 Printable Version
 Mail Merge: Print different names on labels, name tags ... -


 New Messages
 No New Messages
 Hot Topic w/ New Messages
 Hot Topic w/o New Messages
 Locked w/ New Messages
 Locked w/o New Messages
 Post New Thread